Manipulating data with range sliders is a common data visualization interaction. In this tutorial, I will outline how to set crosshairs using range sliders with ZingChart & JavaScript. Here is the example we will be building:
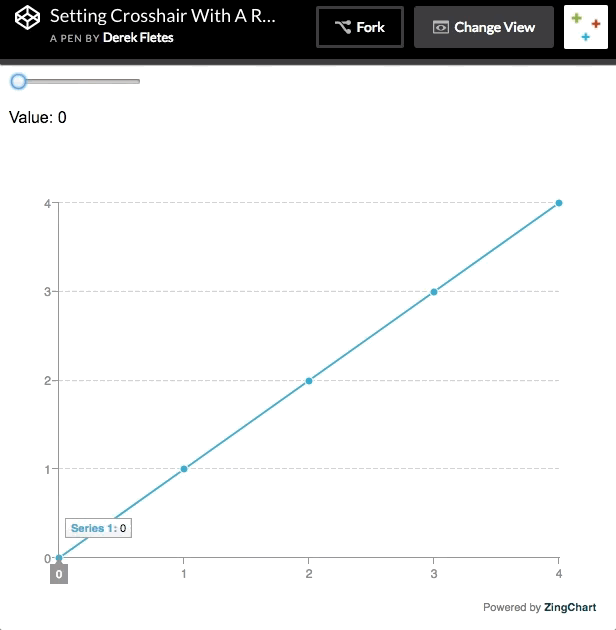
Table Of Contents
HTML
Our first step will be to create a chart container <div> with an ID of "myChart". This ID will be used to render our chart later on.
The next step will be to create a range slider. Range sliders are just a type of <input>. This <input> will take on five attributes:
-
type="range" | Defines our input type as range
-
min="0" | Defines the minimum value of our range slider as 0
-
max="4" | Defines the maximum value of our range slider as 4
-
value="0" | Defines the initial value of our range slider as 0
-
id="mySlider" | Defines the ID of the range slider. We will use this to grab our range slider from the DOM later.
<div id="myChart">
  <input type="range" min="0" max="4" value="0" class="slider"
  id="mySlider"</input>
</div>
CSS
Our CSS will just consist of a height & width. If we do not define this, our chart will not render.
#myChart {
 height: 600px;
 width: 600px;
}
JavaScript
For the first step in our JavaScript, we need to grab our range slider from the DOM. We will use document.getElementByID('') so we can utilize the ID we just gave to our range slider.
// Grab range slider from the DOM
var slider = document.getElementById("mySlider");
Next, we will add an event listener to "listen" for an "input" event. The "input" event occurs when the value of an input element changes. In this case, this will occur each time the value of our input slider changes to a new value.
Finally, we must define a callback function to fire each time the "input" event fires. This function will first define a variable "guideValue" equal to the current event target value, which will always be the current position of our range slider.
// Add an event listener to our range slider
slider.addEventListener("input", function() {
  var guideValue = event.target.value;
  }
});
We will end this function with an if statement. In this example, we only have 4 input values. So we want to write an if statement that executes the following flow: if our "guideValue" variable is less than five, execute a ZingChart API call that attaches a crosshair to the current position of our range slider. It will look like so:
// Add an event listener to our range slider
slider.addEventListener("input", function() {
  var guideValue = event.target.value;
  if (guideValue < 5) {
    zingchart.exec("myChart", "setguide", {
      graphid: 0,
      keyvalue: guideValue
    });
  }
});
To execute an API call with ZingChart, we first must call the zingchart.exec() method. This method takes in two parameters: the chart ID you wish to affect & the ZingChart method you wish to execute.
We will enter the "myChart" ID so we execute this on our current chart. We will use "setguide" as our ZingChart method to execute. This method allows us to set a crosshair to a specific value of our choice.
We can set our "keyvalue" attribute inside of our ZingChart API call to be equal to the "guideValue" variable, which is the value of the "input" event target. This will attach a crosshair to the current value of our range slider.